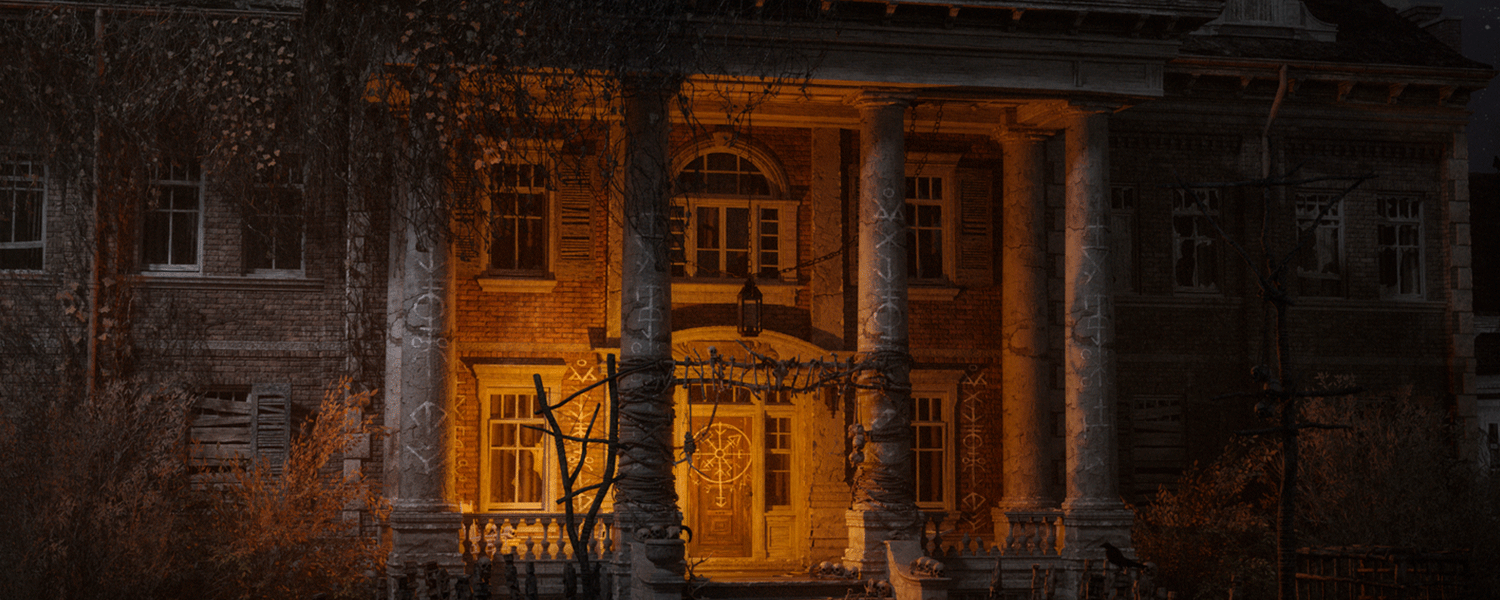
Recreating the Haunted Mansion Busts for Halloween
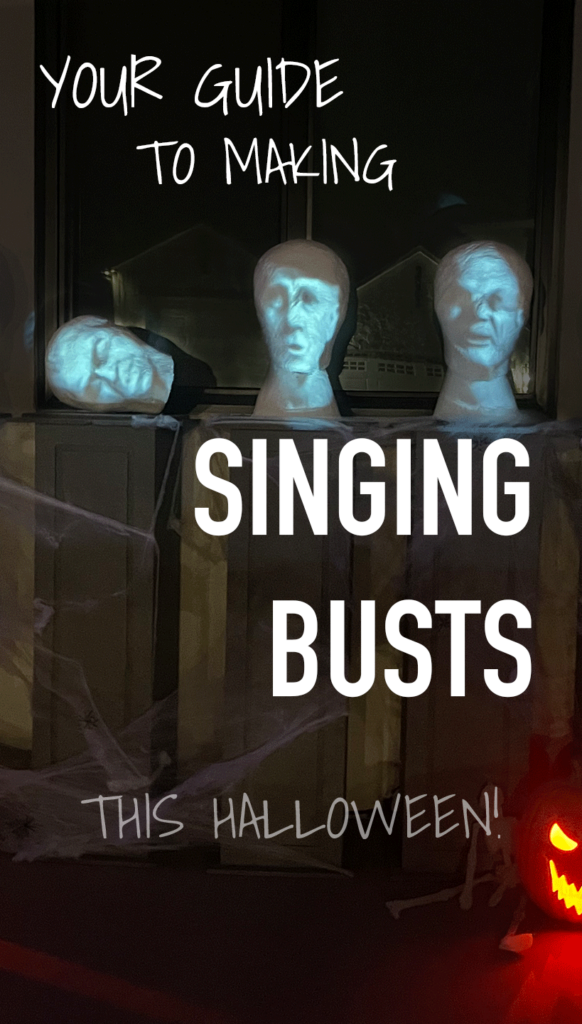
YOUR DIY GUIDE TO RECREATING HAUNTED MANSIONS SINGING BUSTS!


PROJECT OVERVIEW
Looking to add a few extra haunts to your halloween this year?
I’m “dying” to show you this tutorial for how we created ours!
Welcome Foolish Mortals!
Disney World has been a special place for our family for a long time.
This year we decided to recreate the singing busts from the Haunted Mansion ride – we also created the Hitchhiking Ghosts, you can check that out here.
We have seen others do it online before and we finally decided to stop dreaming and just go for it! Perhaps you’re here for the same reason.
There are many tutorials online, and we watched a lot of them!
To be honest, we found most of them overwhelming. We did not want it to be too difficult to accomplish and wanted to enjoy the process.
In the end, we mixed and matched a few different techniques to fit our specific needs and talents and what felt easiest for us to commit to!
Hopefully you’ll find this a simple and straightforward explanation, and don’t forget to watch our Reel to see it in action!
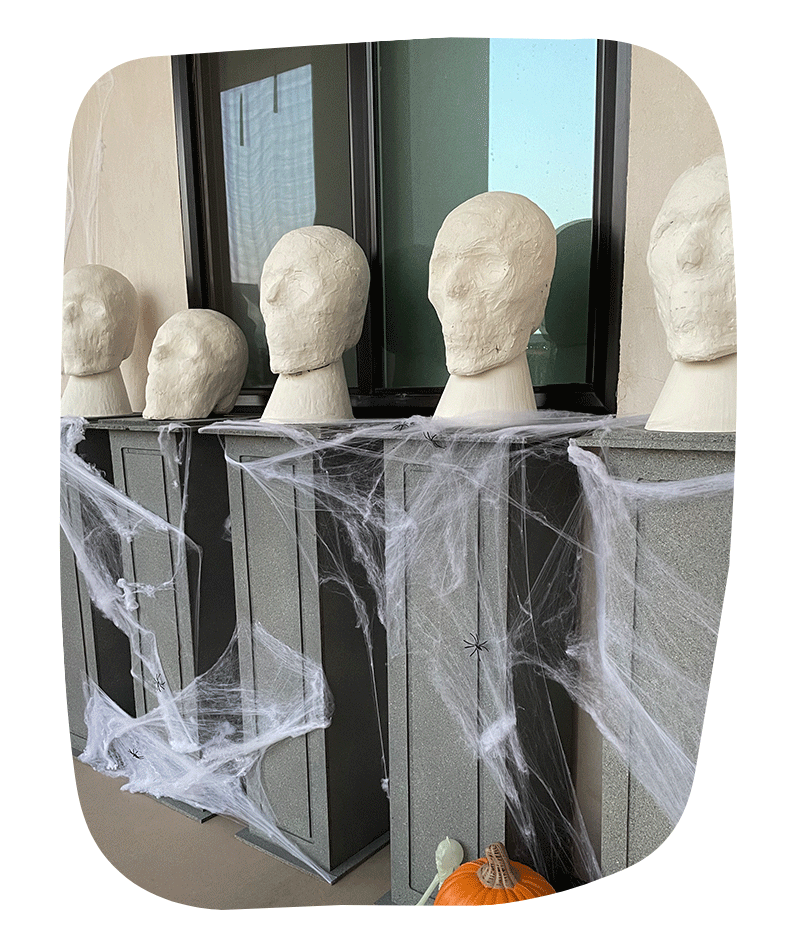
MATERIALS LIST
Here are some of the items we used to materialize our happy haunts!
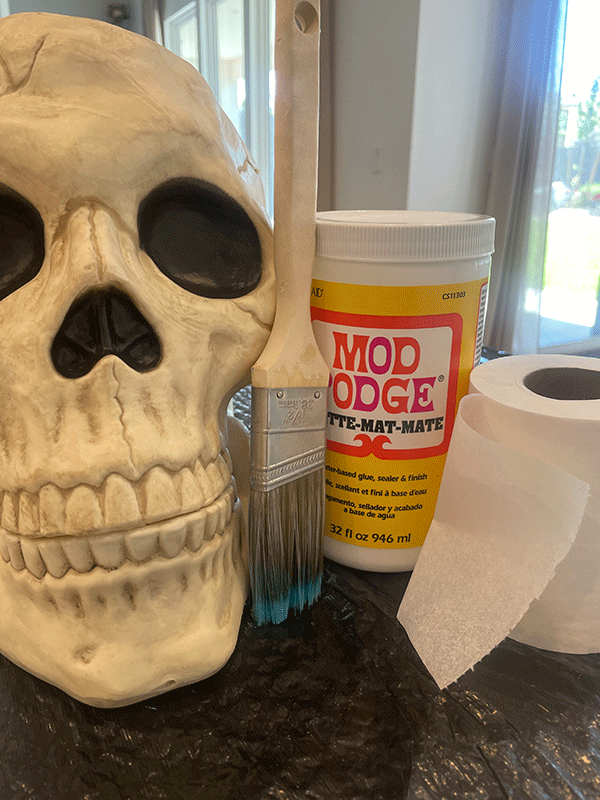
FOR THE HEADS:
If you would like to purchase something, please use our links! We receive a small commission, but your price stays the same and It helps us continue running our blog. We appreciate your support!
- Skulls (at least 4, but you may want more depending on your needs) – $20 – $50 each (see tip), we bought 5.
- Single Ply Toilet Paper (RV Toilet Paper – we used about 1.5 rolls) – $7
- Modge Podge – $12
- Paint Brush – $6
- Spackling – $9
- Plastic Bowls (buy as many of these as busts you plan to make) – $1 each at the dollar store
- Projector – $40+ (price depends on which brand you get)
- Media Player – so you can loop your video
- Singing Face File – heres a link to the one we used on youtube – free!
Sonder Tip: Joanns always has amazing sales, we got all our skulls at 50% off! Simply search for a coupon online or download their app.
FOR THE STANDS
Sonder tip: You do not need to have wood tools on hand for this project, check your local hardware store for rentals!
- 2 Sheets of 4ftx8ft Partical Board (around $20 a piece)
- 5 Wood boards sized 1ftx1.5x6ft
- Deck Screws
- Gray Spray Paint – $6 – we used 2 cans for 5 bases.
- Stone spray paint – $16 – we used just over 2 cans.
- Fishing Wire (for connecting busts to stands – this part is optional)
- Screws (for connecting busts to stands – this part is optional).
PROJECT STEPS
Make sure to start your project far enough in advance for objects to fully dry between steps!

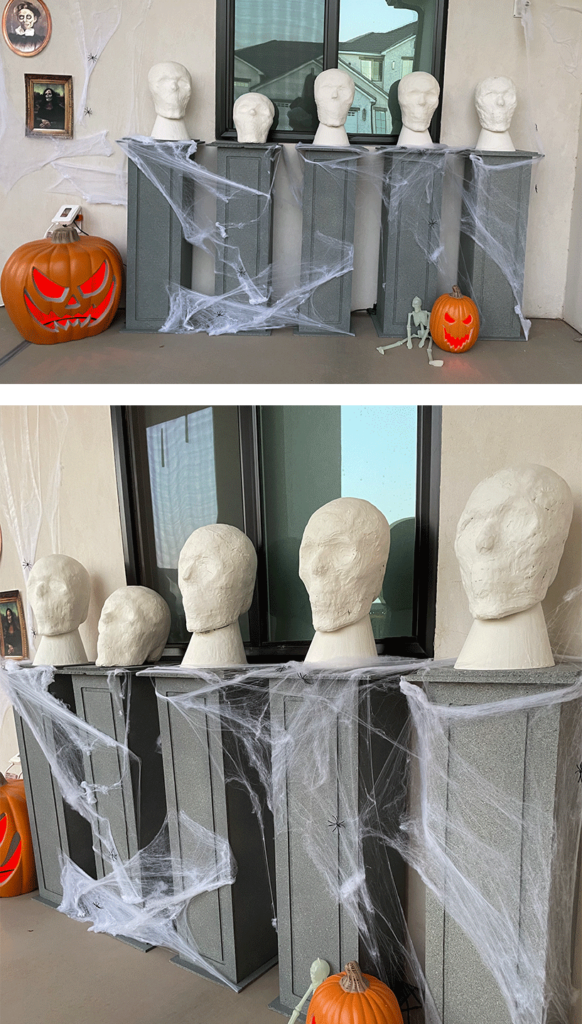
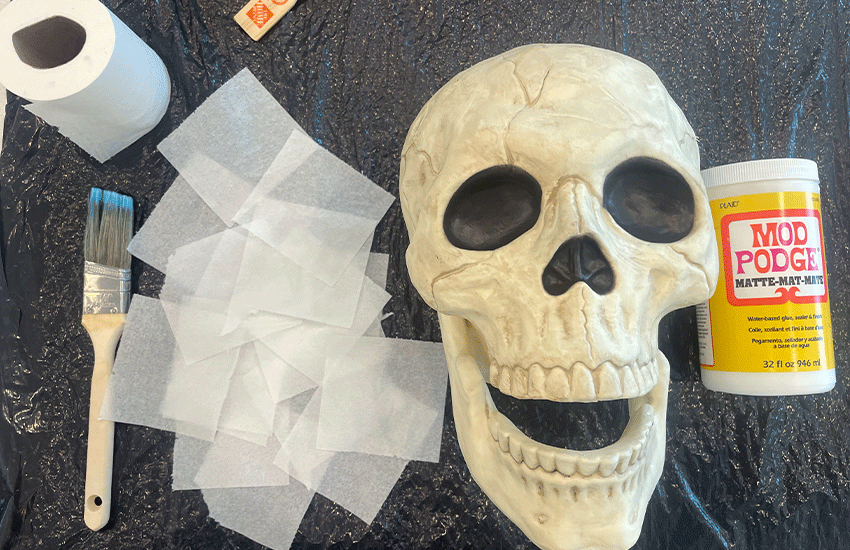
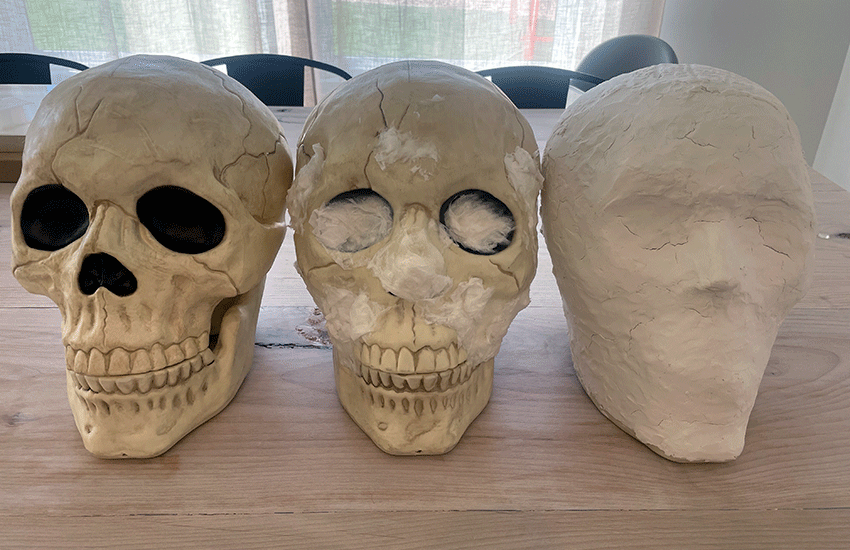
Using a paint brush, mod podge the toilet paper on your skeleton head to fill in all the holes for a smoother look and then shape a nose – this doesn’t need to be perfect, just give the nose something to be built on.
Let fully dry before moving to the next step!
Sonder Tip: Cover your workspace before beginning as this part can be messy. My kids had a ton of fun participating and I would totally recommend letting kids in on the fun!
You want there to be indentations on the eyes, but not too deep. You also want to shape a nose but don’t worry about creating a mouth – make the mouth smooth for the projected faces to look better!
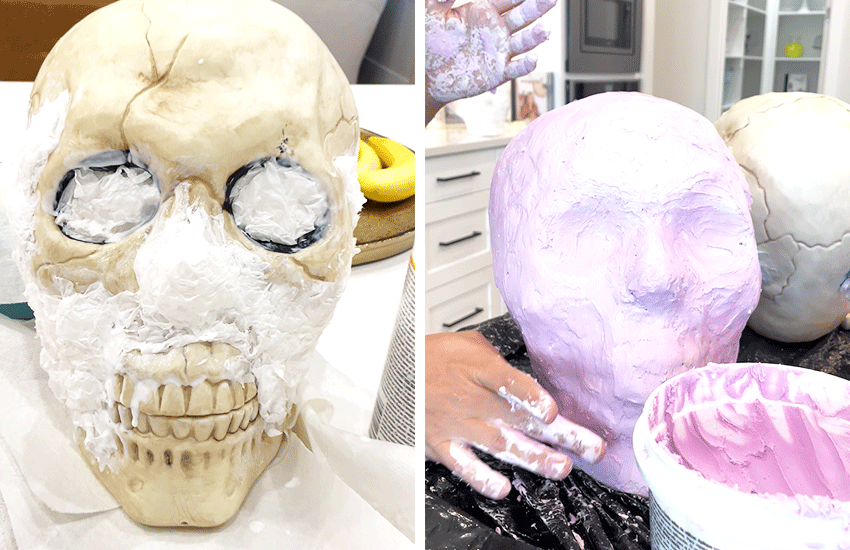
Using your fingers, scrape and pat smooth the spackling onto your bust head until you’ve made it look like a stone statue! This takes a little patience, but as you get used to it you’ll get quicker.
Use it to shape the nose and smooth out the teeth and cheekbones. See the pictures. You do not need to do the bottom of the head.
Sonder Tip: Keep a small bowl of water near while completing this step, and use it to help get a smoother look on your heads.
Let this fully dry before moving to the next step as well. The spackling is pink and dries white (not all are this way though).
Final thought – we spend some time making a few heads extra smooth and the others we just were sloppy with, in the end it really didn’t make a difference when the projector shown on the heads.
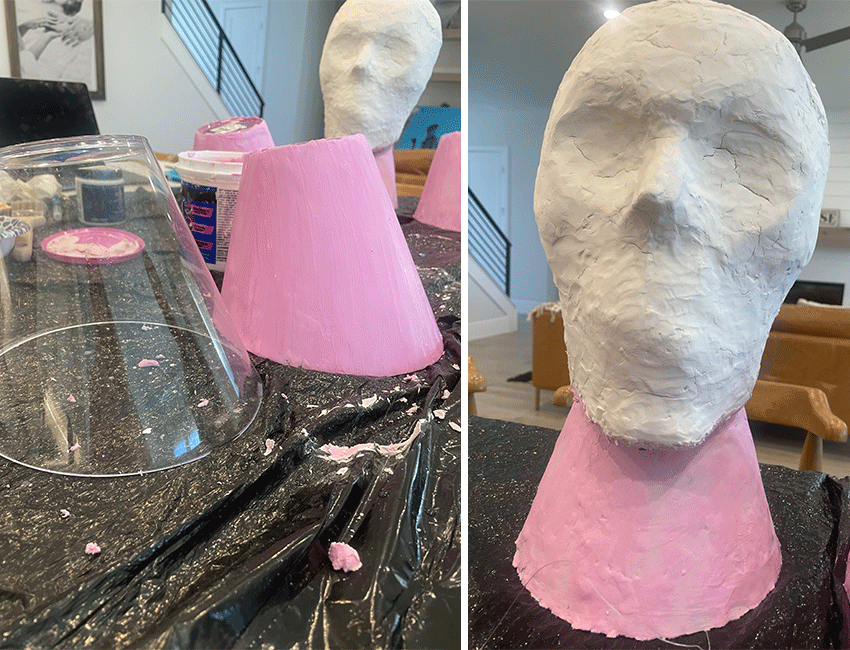
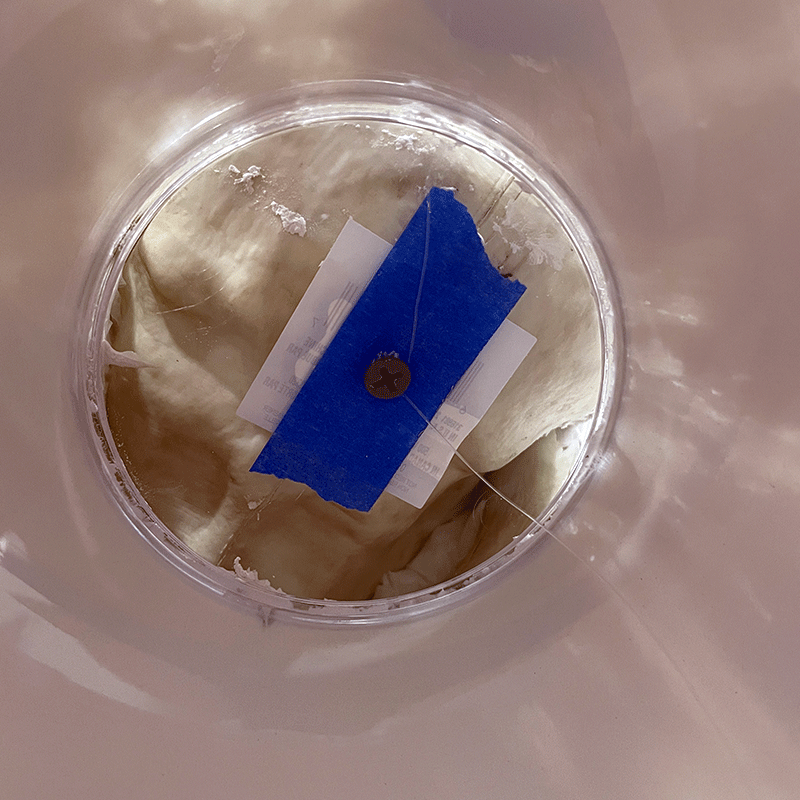
Get all of your plastic bowls and drill a tiny hole in the base. Then apply the same spackling to the bowls as they will be the neck pieces for your heads.
You do not need to apply spackling to the base of the bowl. Also, don’t actually attach the heads yet, this picture is just showing you how the bowls will be used.
Sonder Tip: Again, keep a small bowl of water near while completing this step, and use it to help get a smoother look on your heads.
Generally, we put all the spackling on and then dipped our fingers lightly in the water and applied it to the spackling to smooth it out at the end. We were lucky to find bowls with this unique shape at the dollar store, but any bowl would work.
If you wanted to get extra crafty, you could spackle a bowtie or create some hair for these guys – we skipped that this year.
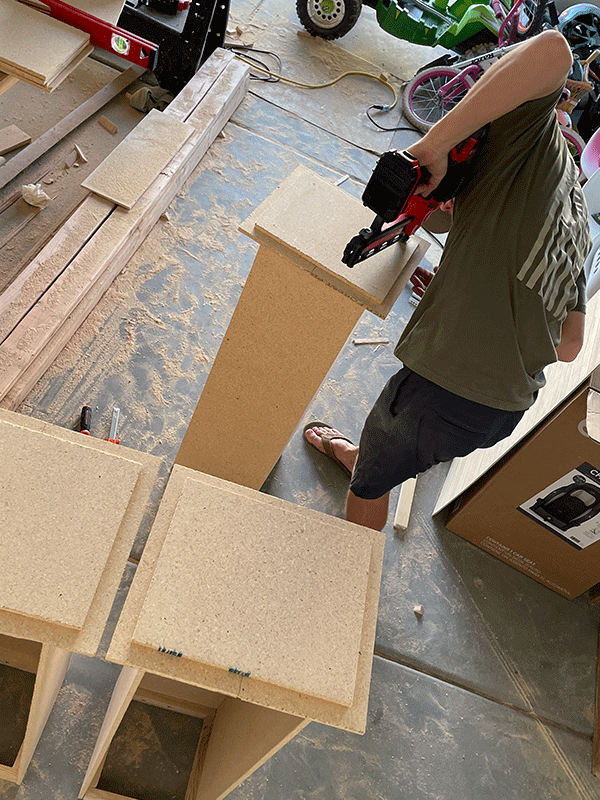
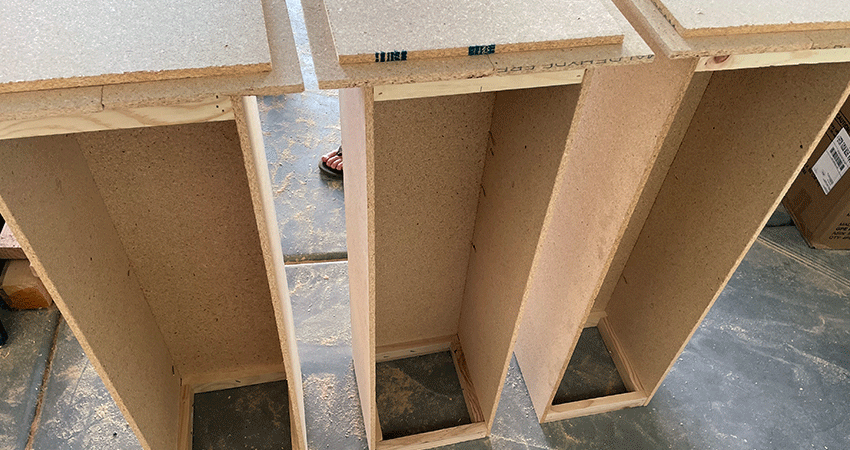
Create the bases! Make the following cuts in your partial board:
Five 1ft x 4 ft strips
Ten 11 inch x 4 ft strips
Now cut 1 ft off all your panels with a table saw so they are 3 ft. tall instead of 4.
Save the leftover squares for the tops/bottoms of your stands.
Set all wood aside.
Make the following cuts I n your 1×1.5×6 boards:
Twenty 11 inch long cuts
Twenty 9.5 inch long cuts
Using a nail gun, make 11×9.5 frames. You should end up with ten frames total.
Now, lay your 1ft. X 3.ft boards flat and line up your frame to the top and bottom of each panel. Attach with nail gun.
Now line up your 11 inch x 3 ft strips to each side of each base. You should end up with 5 bases, each with 3 sides.
Now attach the square leftover cuts to the top of your bases (optional, attach them to the bottom as well for a cleaner look, this may take some extra wood, &/or add a second larger square under the top for a double tiered look).
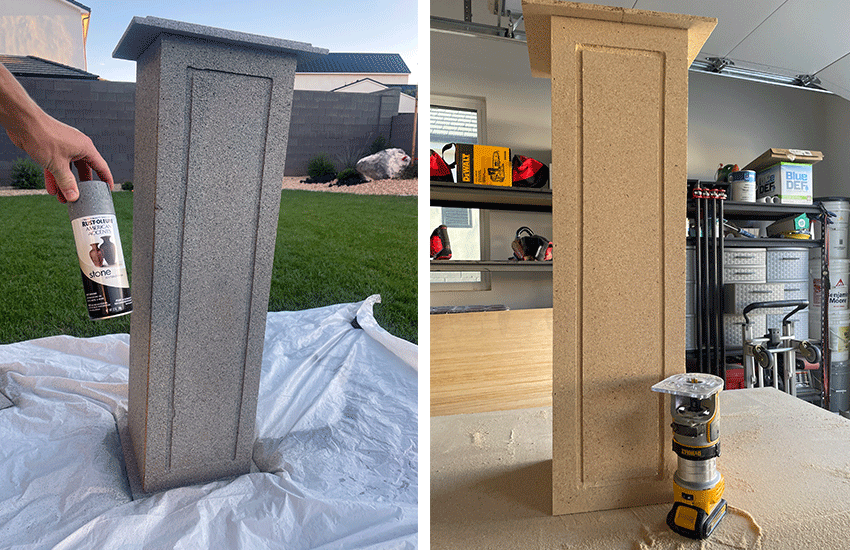
Optional – use a router to add a little decoration in the front.
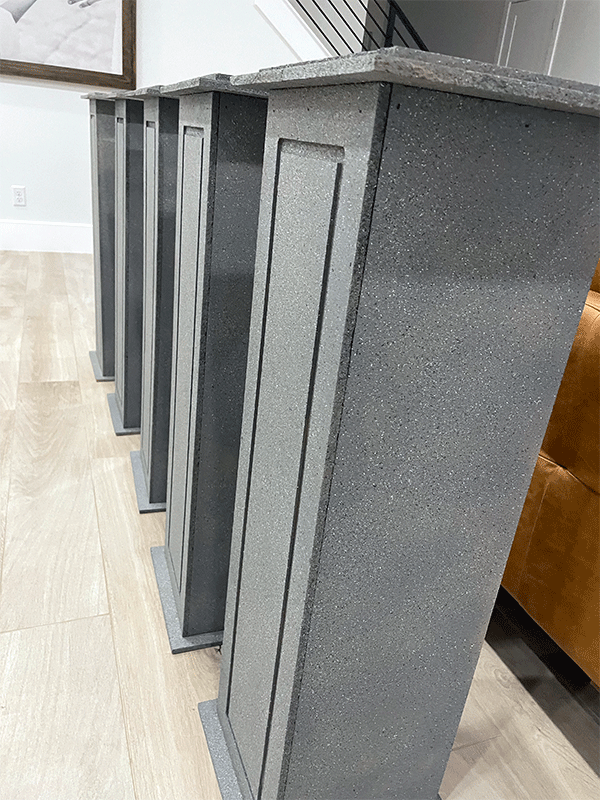
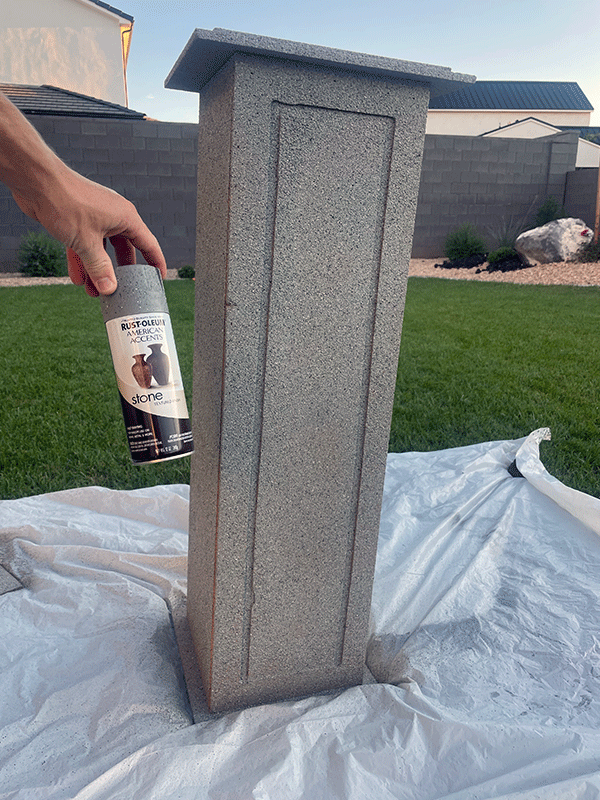
Paint the bases!
Start by spray painting a gray coat onto the wood. This doesn’t have to be very thick – 2 cans lasted us all 5 of our bases.
Once that is fully dry, apply the stone spray paint.
Sonder Tip: Make sure to set up your space for spray paint, it’s not something you want all over your house! Outside is best – we just put down a large plastic table cloth and painted away.
Connect the pieces!
This part is optional – you can simply place the heads on the stands and call it good or if you’re like us, then read on.
We were worried about the heads falling off because we have small children and didn’t want them playing with the pieces.
Solution: We used fishing wire to secure the heads AND so we could easily cut it after the season and remove the heads for storage.
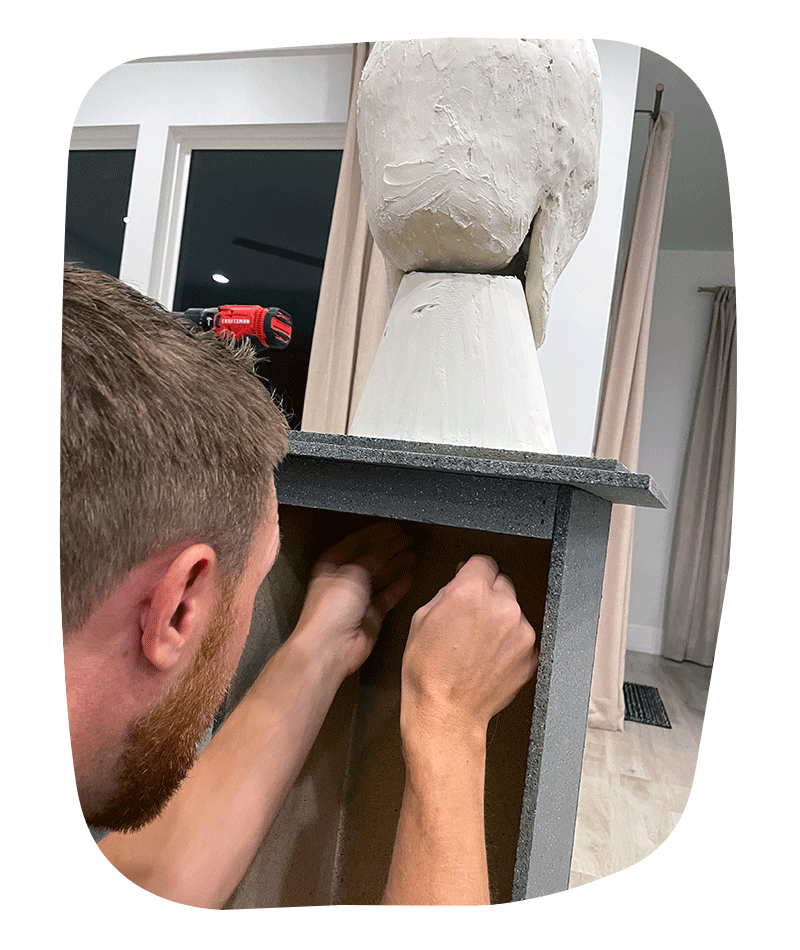
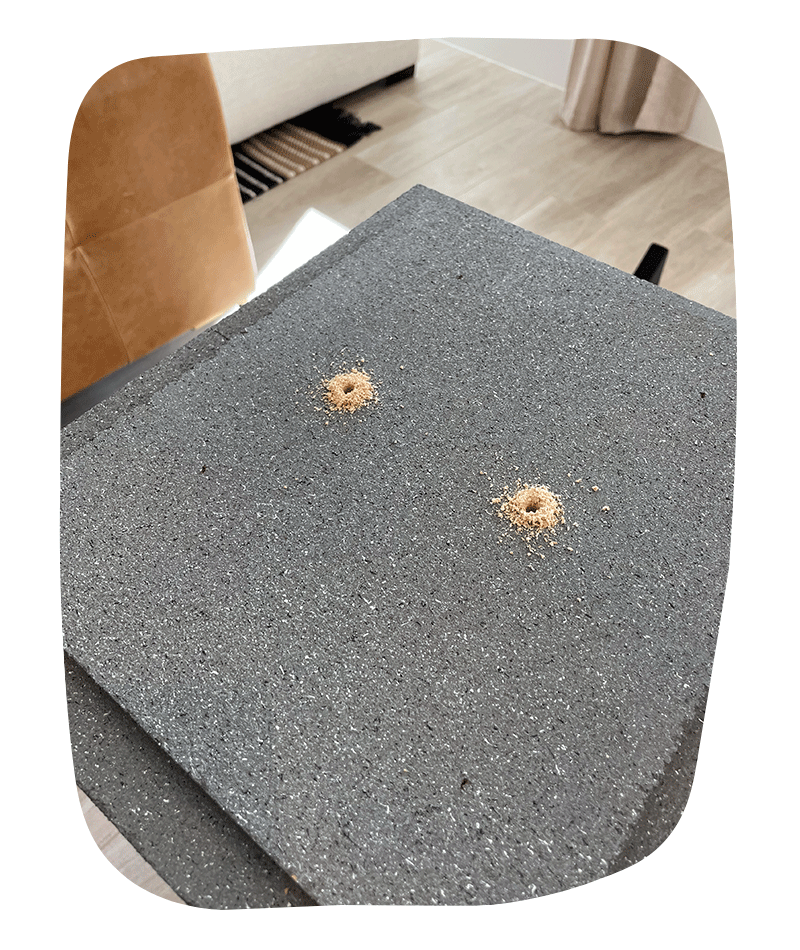
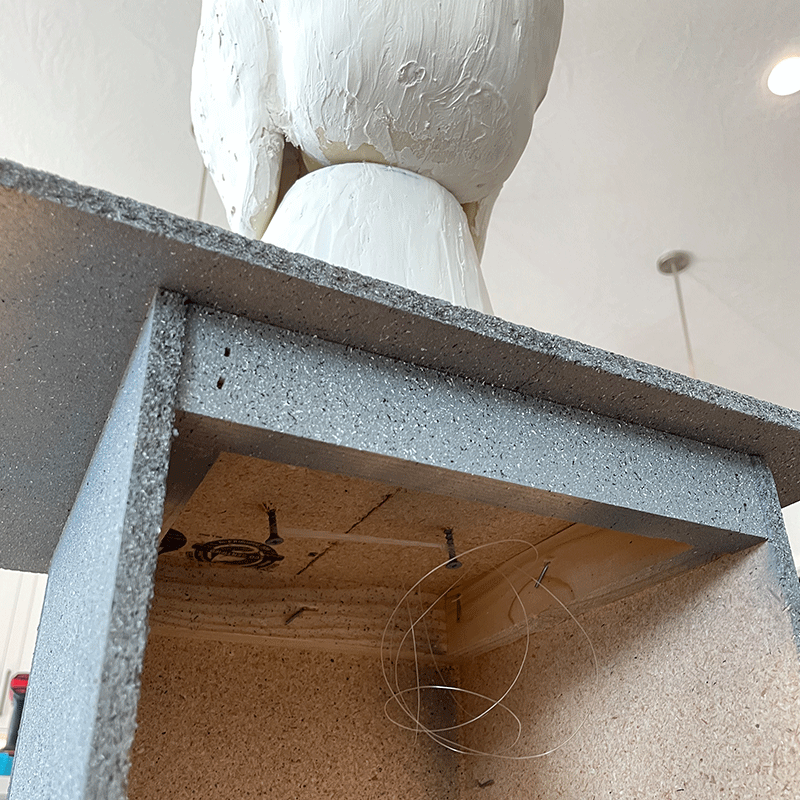
Drill 2-4 small holes in the top of your wood base, make sure the holes are opposite each other and fit underneath the bowl when the bowl is placed on the stone.
Now, underneath your wood base top, attach 2-4 screws near (not in/on) each hole you just drilled, being sure that the screws still fit under the neck piece of the bust (so its hidden from above).
Next, drill a screw through the center of your neck piece and into the bottom of your bust head to connect the head to the neck.
This might not feel very secure at first – ours was a little wobbly because the inside of the head is hollow.
Then, tie 2-4 long pieces of fishing wire tightly around the screw in your bust head/neck.
Carefully pull each wire through the holes of your wood base and tie it to the screws underneath the top of the wood base.
This should secure the head to the neck and the wood base AND allow you to remove the head for storage each year.
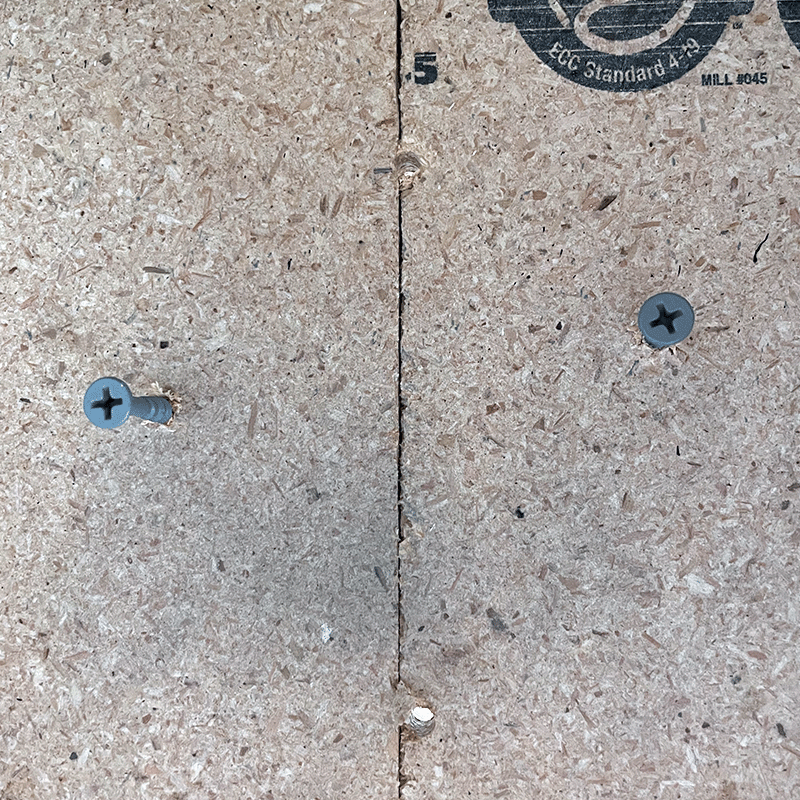
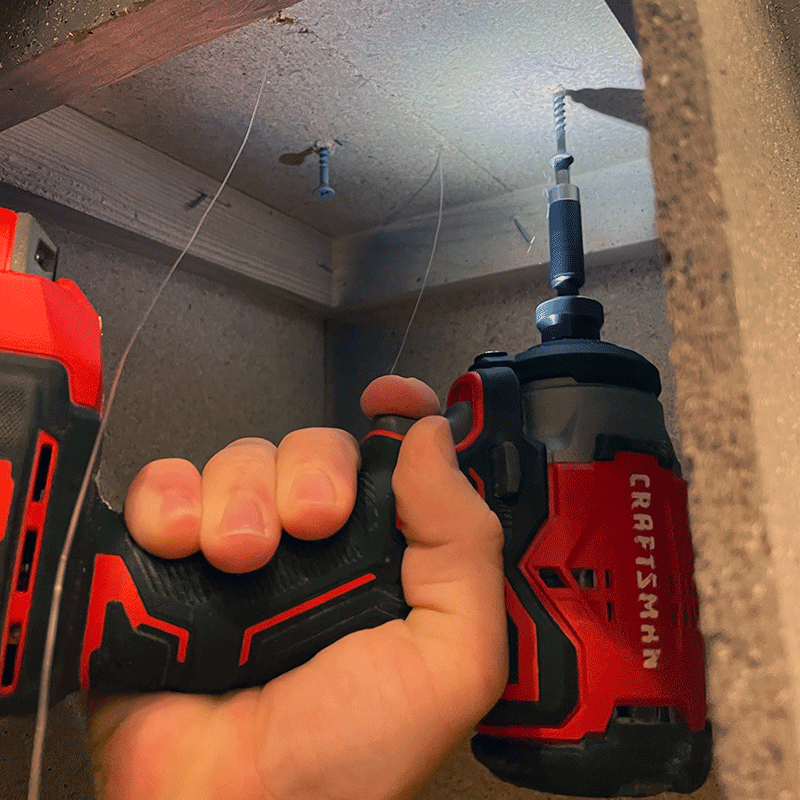
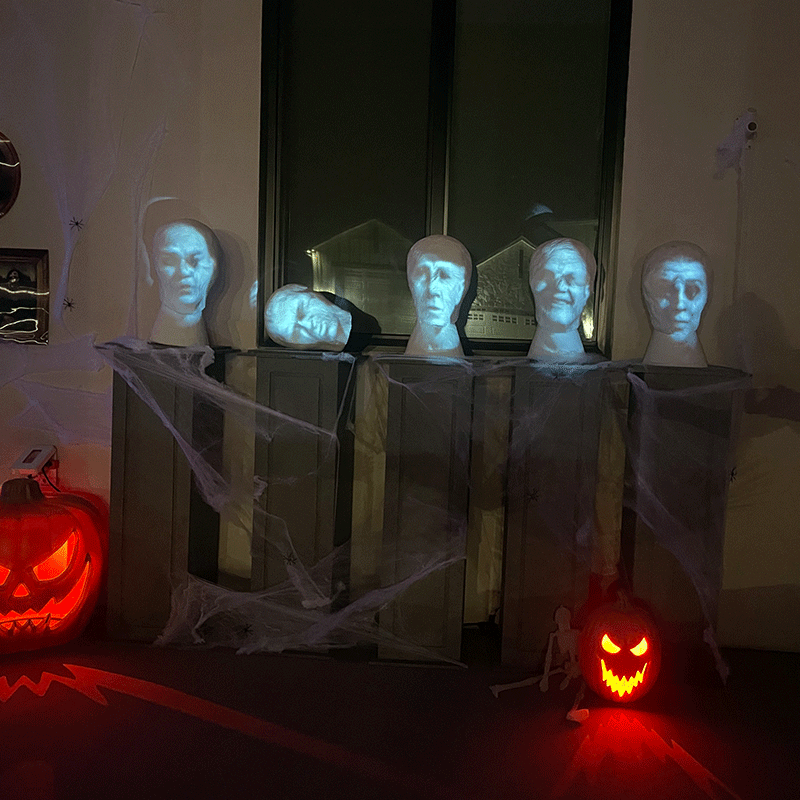
Final touches! Upload the footage of your grim grinning ghosts to a media player that will loop the video (or plug into a fire tv stick, play the youtube video and turn on loop).
Plug this into your projector then place the projector and place all the busts at the correct distances. This may take a little trial and error.
Be sure to adjust the focus on the projector for a clean look. Then be amazed at your work and enjoy your Haunted Mansion Halloween!!
Sonder Tip: If you have some digital media skills, try filming your own families faces for displaying on the grim grinning ghosts! I think we will try to add this next year… 🙂
VIDEO / REEL
Check out this video we made while creating our Haunted Mansion Busts! We hope it helps you while you create yours.
Give us a follow on social media if you enjoyed our tips and be sure to tag us if you recreate this project.
I for one would just be utterly thrilled and shocked to find out if someone enjoyed this blog & our video because it is one of our FIRST ones to go up.
In fact, if youre actually reading this part please reach out with a comment or like. I would be so happy!
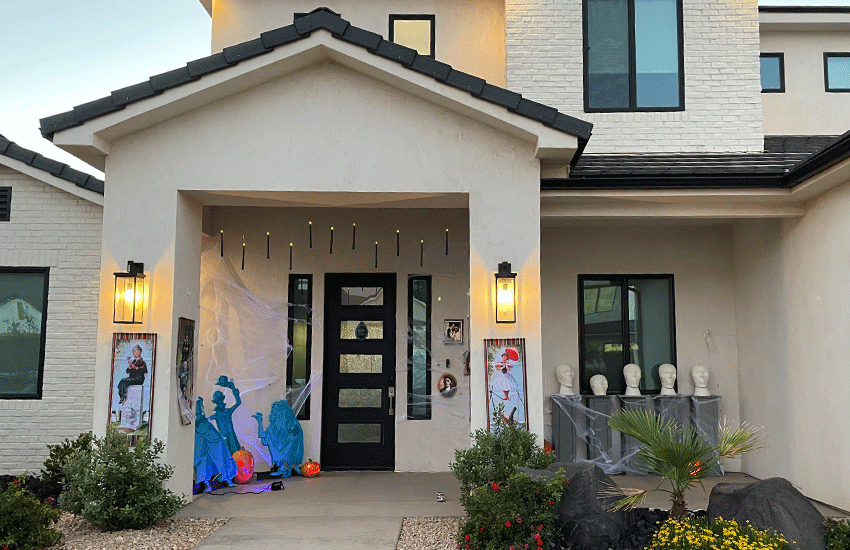
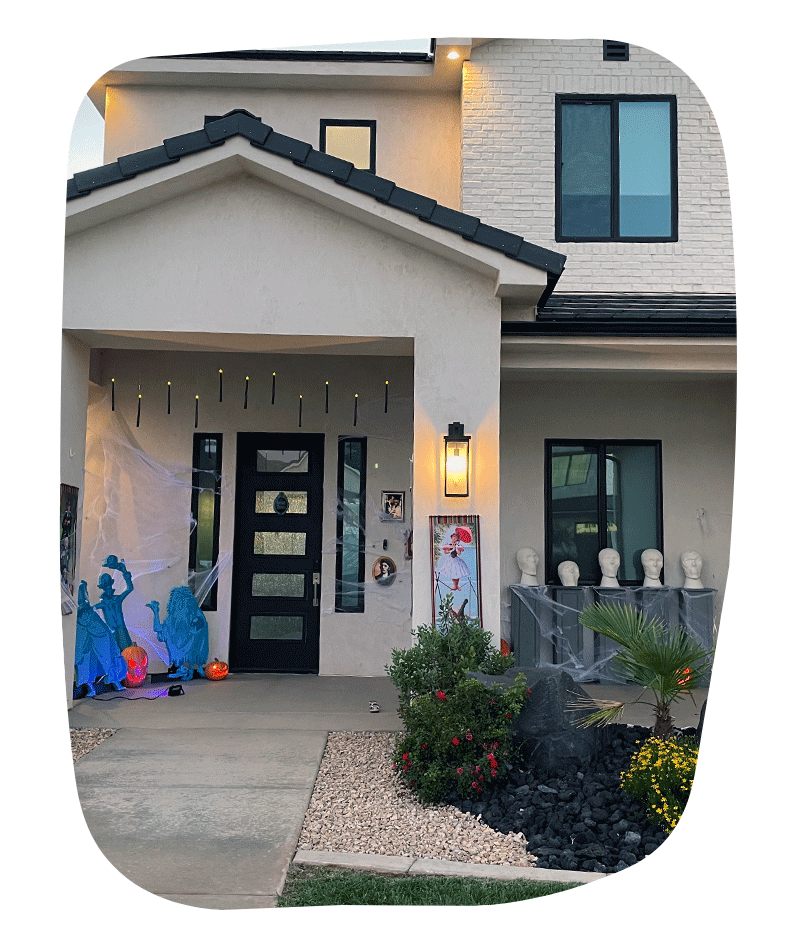
Final photos of our ghostly setup! At night it’s even better!
Hitchhiking Ghosts | Roof Candles | Door Knocker | Horror Photos | Spider Webbing | Haunted Mansion Banners | Hitchhiking Ghosts
FINAL THOUGHTS
If you’re still on the fence about trying all this…jump in! You’ll be so glad you did!
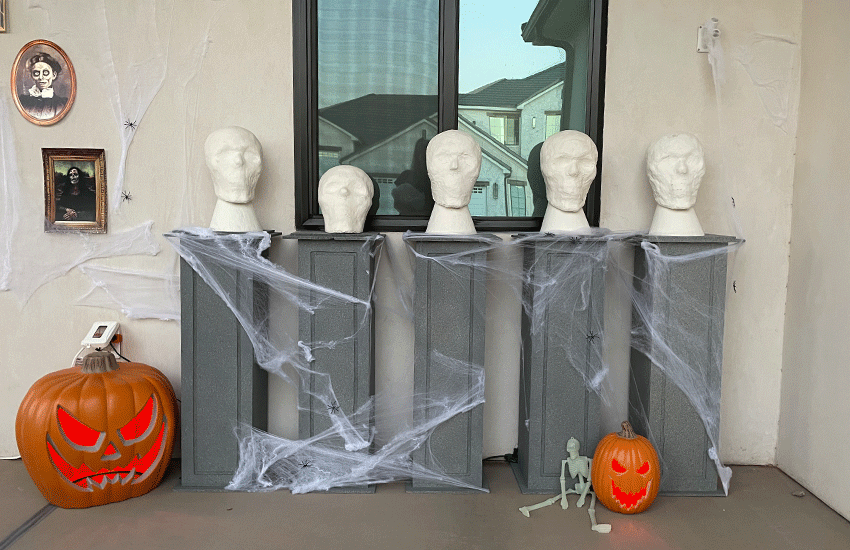
Couple last things to note:
First, I don’t know how these would hold up in harsh weather or torrential rain storms. We keep ours under our covered front porch and they’ve held up great.
Second – if you’re worried about building the bases out of wood or don’t have access to tools, you can still get creative for your display.
You could use cheap laundry baskets from the dollar store, or simply display them on your folding table and add some halloween flair like a black tablecloth and some pumpkins. Whatever you do, just have fun with it!
Lastly – We do not have ANY experience creating halloween decorations.
This was quite literally our first attempt. So I just want to state here that if we can do it…YOU CAN DO IT!
Trust me. It really wasn’t too hard. Just took a little commitment.
Hurry Back…Hurry Back!
Be sure to bring your death certificate… if you decide to join us. Make final arrangements now!
We’ve been dying to have you…”

